How to display HTML code in a Blogger Post

Do you want to display some HTML Code in your post as it is. As some of the HTML symbols have some special meaning in HTML so it is very difficult for HTML/XML parser to differentiate between them and the actual programming HTML code.
The result is that HTML code does not appear in your blogger post. Therefore it needs to tell the browser not to parse the HTML code so that it will be displayed correctly. Web design practices also suggests that HTML Code should look different from rest of the content therefore it’s better if displayed in a separate box. The background and color settings of the box can set in the CSS code.
Step 1: Parse/Encode the HTML code using an online parser like centricle.com and save this code in a notepad file for further use.
Step 2:Copy the code below
.postCode{
background: none repeat scroll 0 0;
border:2px solid Silver;
height:'auto';
margin:10px;
overflow:auto;
padding:6px;
text-align:left;
}
and Paste this code above the following line of code.
]]></b:skin>
Step 3:Implementing the HTML code
Go to Posting>Create a new Post
Step 4: Click the Edit Html Tab(in Post editor)
<pre class='postCode'>
Paste your Encoded/Parsed HTML code here(created in Step 1)
</pre>
Step 5:Publish the post and see the post if HTML code is displayed in desired format or not.
Let's take a look at the screen shot as below:

Blogger Template
Recent Articles:
Web 2.0 Skills
What is Web 2.0
How to submit blogger blog sitemap to google
How to add Favicon icon in your blogger blog
10 Tips to increase traffic to your blogger blog
How to add Tags in a post in blogger template
Tips to speed up Your Computer
Blog Title’s Dilemma
How to embed comment form below Post in blogger template


How to Add a Language Translater Widget

Do you want to add a Language Translator widget to your Blog, offering your readers the functionality of converting the blog in any language.Both Microsoft and Google added widgets for translating your web page into another language. I have recently added a Google Language Translate Widget in my
Blog. With this Google translation widget you can translate English to many other languages like Arabic , Bulgarian , Chinese , Croatian , Czech , danish , Dutch , Finnish , French , German , Greek , Hindi , Italian , Japanese , Korean ,Norwegian , Polish , Portuguese ,Romanian , Russian , Spanish and Swedish. Lets take a look at the widgets:

Here is the step by step procedure to add Google Translate widget:
Step 1:From dashboard Log In to your blogger account and go to Layout.On the right side bar Click the Add a Gadget tab and select HTML/Java Script from the widget type list.
Step 2:Paste the following line of Code into the above created widget:
<script src="http://www.gmodules.com/ig/ifr?url=http://www.google.com/
ig/module/translatemypage.xml&up_source_language=en&w=160&h=60&title=&
border=amp;output=js"></script>
Step3:Save changes and Preview your blog to see the widget working or not.
Now let's have a look at the sample Page after the translation in Hindi:


Conclusion: I have used the Google Translate Widget in my blog and its translation is good except some minor mistakes.The only thing i dislike about this widget is that it has got a slightly big size as Google Logo has been embeded inside the widget. Other popular widgets are Microsoft Translate and Yahoo Babel Fish.The Microsoft widget works only with Internet Explorer and the Yahoo Babel Fish widget does not support as many languages as a Google widget.
Tech Blog
Recent Articles:
Web 2.0 Skills
What is Web 2.0
How to submit blogger blog sitemap to google
How to add Favicon icon in your blogger blog
10 Tips to increase traffic to your blogger blog
How to add Tags in a post in blogger template
Tips to speed up Your Computer
Blog Title’s Dilemma
How to embed comment form below Post in blogger template


Side-Effects of Blogging

I started blogging after reading a article in newspaper about the blogging guys who are into the business of blogging after quitting their high paying jobs. Then, i started reading blogs like Digital Inspiration, ProBlogger and some other, all were telling the benefits of blogging and getting inspiration from these bloggers pushed me to start a blog. Now it's been a couple of months of my blogging life and believe me i am feeling  the side effects of blogging.

Even the most beautiful things have some kind of side-effects whether they are less serious/casual in nature. For eg.like medicines(which saves so many lives) have some kind of side-effects so as blogging though they are not as serious as the side effects of medicines. Though blogging is in fashion these days but it also has some casual side-effects:

Before i could thought of writing a post on side-effects of blogging ,i noticed some physical side-effects of blogging like sore back and mental fatigue. Before i further go into the side-effects, let's have a look on the Oxford Dictionary's definition of Blog:

According to Oxford Dictionary a Blog is "a Web site on which an individual or group of users produces an ongoing narrative." According to Wikipedia
"A blog (a contraction of the term "weblog") is a type of website, usually maintained by an individual with regular entries of commentary, descriptions of events, or other material such as graphics or video. Entries are commonly displayed in reverse-chronological order. "Blog" can also be used as a verb, meaning to maintain or add content to a blog. Many blogs provide commentary or news on a particular subject; others function as more personal online diaries. A typical blog combines text, images, and links to other blogs, Web pages, and other media related to its topic. The ability for readers to leave comments in an interactive format is an important part of many blogs."


I conclude that a blogger need to collect a lot of information when writing a post. He may have to type lot of text and to collect images and links needed to write a good post. He may also need some data for writing a comprehensive article so may need to frequent search information on google search.Therefore a blogger usually spent most of their time sitting on computer, browsing different websites to mange their blogs.Now i will discuss some positive and negative side-effects of blogging.

My life style has been changed a lot because of blogging and here you can see the comparative view before and after i started blogging.
                                               Before                                              After
Rise Time                              Early 7AM                                      Late 10AM
Tea                                         3 Cups in a day                              5-6 cups in day
Lunch                                    1-2 PM                                            2-4PM
Dinner                                   8-9PM                                             10-11PM
Going to sleep                       10-11PM                                         12-2 AM

Some of the general negative effects of Blogging are:


Sore Back and mental fatigue: An overdose of blogging may result in sore back and fatigue.So keep your blogging sessions short and take short breaks after a couple of hours blogging session.
Lack of Vitamin D:I usually remain indoors since i started blogging and this can lead to lack of Vitamin D.When we remain indoors there is less exposure to sun therefore may result in lack of Vitamin D.
Skipping of Meals:You would also agree with me that usually bloggers skips meals as they completely lost in blogging.This may result result in more intake of Tea/coffee and Snacks which is not very good for our health.


Reduction in Creativity: Bloggers spent most of their time on Internet searching various information/data for the articles they wish to write about.You may become less creative as you usually finds every information/data on Internet.


Some Positive effects of Blogging:
Typing Speed:Your typing speed may improve and you become better at remembering the spellings.
Internet Knowledge:Your knowledge of Internet can increase and you may become an expert of goggle search and Internet.
Practice of Writing:You may become better at writing as you end up practicing writing almost every day.
Self esteem Booster: Your self esteem can increase as you feel there are people who reads your posts and care about you.
Financial Gains: Blogging can give you name,f ame as well as money.You can earn a substantial amount of money by displaying AdSense Ads and the ads from other websites like infolinks etc. .


Do's and Dont's for Bloggers:
1.Keep your blogging sessions short not more than couple of hours.
2.Do some yogic exercises and meditation for a healthy body and mind.
3.Do not replace your meals with refreshments as most of the bloggers usually do.
4.Go for a nutritious meal as this will help you writing creatively.
5.Now the most important advice, you should meditate for at least 15 Minutes to 30 Minutes if you want to be a successful blogger.Meditation brings a clarity of thoughts which is very important in writing/blogging.


Reactions: New feature by Blogger

Recently Blogger has added a new feature for bloggers,to get the quick reactions of readers.The feature was much awaited by the bloggers and finally google has paid attention to the voice of bloggers and came up with a feature which i call as fresh.
Some of the readers of a blog will find it easier to give their feedback about an article rather than going through a series of steps to comment.I have already added this feature as you can see below the post title.Here is the step by step procedure to add a Reactions button:
Step 1:Log In to your blogger account and from dashbord Go to Layout>Page Elements.
Step 2:Focus on Blog Post and click the Edit button as:
Step 3:You will see following screen as:
Check the Reactions From the list of options and Press the Save Button.
Ste 4:Click the Vew Blog link and You will see reactions feature has been added in your posts.
I hope now bloggers has a reason to smile, atleast they hope to get some quick reactions from the readers.
Recent Articles:

What is Web 2.0
How to submit blogger blog sitemap to google
How to add Favicon icon in your blogger blog
10 Tips to increase traffic to your blogger blog
How to add Tags in a post in blogger template
Tips to speed up Your Computer
Blog Title’s Dilemma
How to embed comment form below Post in blogger template


Understanding Web 2.0 Part 2

Blogging Websites: The most appropriate example of Web 2.0 website is a blog where users/readers can write comments on the blog, which might be useful for other readers. Users can subscribe to RSS feeds and remain updated with the blog content. RSS feeds are updated summary of the frequently updated blog content/posts. Blog websites are even one step ahead to fit into a web 2.0 website. Do you know why because readers of the blog can virtually force the author to write something of their interest therefore having a virtual control on the content of the blog website. Some of the popular blogging websites are Blogger,WordPress and TypePad.

Blogger is good for bloggers who want to create their own blog , free of cost and WordPress is good for the bloggers who do not want to compromise on the aisthetics of the blog no matter how much it costs.
One of the typical Web 2.0 application found in a blog is Label Cloud as shown below:
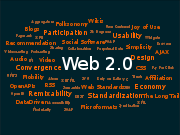
You have often seen this graphic in a blog and is popularly known as label cloud. All the topics/categories of a blog content are integrated in a single graphic which lets the users to click on the topic they are looking for, adding to the aesthetics of the blog.

Social-Networking sites: Some of the popular social networking sites are Orkut, Facebook, and Hi5. These web sites give you the opportunity to make friends, share information like photo, video and take part in online discussions on the web. I don’t know how real are the identities of these people who appear on these sites in fact you never know who are these people. One thing that I like about these sites is to offer quick solutions to those people who want be someone else who they wish to, can do it here on these sites by just clicking some links. Creating a fake identity on web is like made to order child which is impossible in real life So I think that social networking sites can be called the best examples of Web 2.0 as they motivate/encourage the users to adding content, making changes to the aesthetics of their profiles on site and using content in a different format anywhere on the web.
Some of the popular social networking sites are:
Orkut,Facebook, MySpace, Bebo,Friendster, hi5,PerfSpot, Yahoo 360,Zorpia, Netlon.

Personally I do not like any one of them because none of them can be called a social networking site unless they guarantee the identity of the people appearing on these sites. These sites encourage users to create their virtual network and therefore I call them as virtual networking sites unless these virtual networks get a life.

Video sharing sites: YouTube is the most popular video-sharing site these days. Users can upload their videos and will be available for other users to see them. In a way users are contributing value to the content of the website and therefore can be called a Web 2.0 website. Some More examples of Video sharing sites are as:
YouTube: YouTube is a popular free video sharing Web site, which lets users upload, view, and share video clips. It is so popular that many people think that You Tube is the only video-sharing site on the web.
Meta Cafe: Metacafe - Get the best Internet videos - Funny videos, Amazing clips, Rare movies.
Vimeo: Share your video clips. Upload video that you shoot with your digital camera, mobile phone, or camcorder. Share video by linking to Vimeo.
Some other popular video sharing sites are:
DailyMotion,Imeem,ClipShack,vSocial,Jumpcut,VideoBomb,eyeSpot,revver Avidbeauty

Photo sharing sites: This web site allows users to upload and share photos. Some of the Popular Photo sharing web 2.0 Websites are as:

Flickr: The best way to store, search, sort and share your photos
Zooomr: Universally the best way to share, search, store and sort your photos online.
HQ:Are your photos stuck on your hard drive, instead of being shared with the people who matter to you?
Mybloop: MyBloop - sharing pictures, audio, and video for free, whithout storage limits and additional software to install

Wikis (like wikipedia): These websites allows users to add content and even to edit already added content/articles.
Wikipedia: The biggest multilingual free-content encyclopedia on the Internet. Over two million articles and still growing.
LittleWiki: LittleWiki is a Web site where you can create public and private wiki pages. A Wiki is a Web site where anyone can enter and edit content. That means you can post and edit information about virtually anything you wish, and you can read what others have posted too.
Wetpaint: Wetpaint powers websites that tap the power of collaborative thinking. The heart of the Wetpaint advantage is its ability to allow anyone — especially those without technical skill — to create and contribute to websites written for and by those who share a passion or interest. To do this, Wetpaint combines the best aspects of wikis, blogs, forums and social networks so anyone can click and type on the web.
JotSpot: Create and share wiki pages with a WYSIWYG editor via Jotspot's secure wiki hosting. Install various "applications" to refine your wiki content - project manager, company directory, blog, forum, poll, calendar, and more - then invite others to contribute
PBWiki: Make a free, password protected wiki as easily as a peanut butter sandwich. Easily upload HTML, link files to your pages, integrate RSS, and more.

RSS (Really Simple Syndication): An RSS document (which is also called a "feed", "web feed" or "channel") includes full or summarized text, plus metadata such as publishing dates and author name. RSS format is used to publish frequently updated data such as blog posts, data from news websites.
FeedBurner: FeedBurner helps bloggers, pod casters and commercial publishers get more value from the content they create. Our advanced feed management technology deftly delivers subscription services to the users. Personally I am using feedburner to burn RSS feed of this blog.
Feed Digest: Feed Digest is a parser, regenerator, and syndicator for, and of RSS and Atom feeds. It lets you do things like put the content of RSS or Atom feeds on your own site(s). Some other RSS sites are Attensa, Tiny RSS,Feed43,Feed Mailer.

Mashups: A mashup is a composite web application, where data sourced from one site is then mashed up with the data sourced from other site and then put on a single website/platform. There are many types of mashups, such as consumer mashups, data mashups, and business mashups. The most common type of mashup is the consumer mashup, aimed at the general public. Examples include Google Maps mashups, which combine web-based data sources with interactive cartographic maps. The potential uses of mashups are as wide and varied as the Web. Examples of mashups are CoolFlick, Flickervision, MapmyEvent, and Google Map etc.

The great thing about Web 2.0 websites is that they all have got very user-friendly interface. All you have to follow the guidelines provided in the website and make your own content/website and it’s all free. Is not it feels great?

RELATED ARTICLES
How to submit blogger blog sitemap to google
How to add Favicon icon in your blogger blog
10 Tips to increase traffic to your blogger blog
How to add Tags in a post in blogger template
Tips to speed up Your Computer
Blog Title’s Dilemma
How to embed comment form below Post in blogger template


How to Submit Blogger Blog Sitemap to Google

If you want to get included in Google search Results you have to submit your Blogger Blog/site to google.Here is the step by step procedure:

Step1:Login to your Blogger account and from the dashboard Click Webmaster Tools link.You will be landed into the screen shown below:


Step 2:Click Add a Site Button and You will see the following screen as below:
Type the url of your blogger template site and click Continue Button.

Example:yourblogname.blogspot.com(Do not use www or Http before the url)

Step 3:Now google asks you to verify your site as shown below:
Here you can see that Status as NOT VERIFIED.
Step 4:Now you have to verify your site.Copy the Meta tag displayed by Webmaster as you can see in above picture and paste it at the place shown in the above picture.In case you are not sure where to paste meta tag then From Dashbord Go to Layout>Edit HTML and find the Title Tag and Paste the meta tag just above the Title Tag,save your Changes and see the status of your site in webmaster tools and it will be shown as Verified status OK.
Step 5.Now in webmaster tools Go to Dashboard and Click Sitemaps and you will be landed into following screen as:
Click on the Add a sitemap Button and you will see Following screen:

Type "rss.xml" in the box provided next to your blog/site url and click Submit Sitemap Button.Blogger creates a RSS feed at the time when you create your blog and google accepts RSS and Atom feed as sitemap.

Its done now and google will take some time to tell the status of indexed urls of your Blogger Blog site.
Recent Articles:
What is Web 2.0
How to add Favicon icon in your blogger blog
10 Tips to increase traffic to your blogger blog
How to add Tags in a post in blogger template
Tips to speed up Your Computer
Blog Title’s Dilemma
How to embed comment form below Post in blogger template


How to add a Favicon in blogger Template

From the last couple of days you would have noticed that an image appearing next to address bar in my blogger template website. Now you would want to know that what is this image called and how to add it your blogger blog. This image is called as favicon (Short for Favorites Icon).


In a browser window Favicon is displayed on the Address line and in the Favorites menu. The Favicon allows the webmaster to further promote their site, and to create a more customized appearance within a visitor's browser.


I fall in love with Favicon when i saw some blogs showing thier own favicon icons in my browser window as if they are teasing me to get the one.I make my mind to get the same for my blog gbut i was busy doing some other important modifications in my blogger template.So i postponed the idea for a couple of months,but i could not resist my self from getting a favicon more than a couple of days.Now its here next to my blog address in your browser window and in favourites menu as well as in Bookmarks list.Favicon icon gives your blogger blog an identity so that anyone can identify your blogger template blog by just having a look at the favicon logo.


How get a Favicon?
If you wish to create your own Favicon, you can use a free online Favicon Generater available on the web. Some of the popular free online generater websites are:


DynamicDrive.com(Easy to create Favicon & good user interface)
Html-kit.com(Simple and easy to Create Favicon)
Favicon.co.uk
Favicon.com
Genfavicon.com
Favicongenerator.com
Graphicsguru.com


These tools will allow you to generate a favicon.ico file from any image on your computer.As far I am concerned , I have used DynamicDrive.com because generating the favicon icon here is very simple and quickest. You can use anyone you like. All online Favicon generater creates almost same kind of Favicon files(I mean .ico files).

You can use any image file you like to make your favicon. As far as I am concerned i have created an image of 160x160 pixels in Photoshop.Here i am giving you some idea about how to create an image in Photoshop that could be suitable for generating favicon.I have created new file change the size to 160x160px and put a single "m" in bigger font,change the color as you like.Save the image in JPEG format and use it to create favicon in any online favicon generater discussed above.


Step 1:Press the Browse button and select the file(JPEG,GIF,PNG etc) from yor computer.
Step 2:Press the create Icon Button.
Step3:Preview the favicon and press Download/save to your Computer.
Now you have got the Favicon.ico file all you have to add it to your blog website. There are 2 methods for doing this given below:

First Method:
Personally I have used this method to add Favicon icon in my blogger blog because this method s is very simple.
Step1:Login in to your blogger account From the Dashboard>Layout>posting>Create a new post


Step 2:Press insert picture button and browse and upload the Favicon icon form you computer ,preview it and using the right click on the Favicon icon,copy image location and save this in a text file for further reference .Hide the preview and Save this post as draft.(Do not publish it because we are using this post only to store the image(Favicon icon).


Step 3:From your Dashboard Goto>layout>Edit HTML. Check Expand Widget Templates and download the full template before making any change.
Step 4:Scrool down to where you find this line of text
]]></b:skin>

Step 4:Add these lines of code(in Blue) below above line of code.


<link href=’Paste Your Favicon image url here’ rel='shortcut icon'/>
<link href=’Paste Your Favicon image url here’ rel='icon'/>


Step 5:Save the template and Preview you blog website. If all have gone well the Favicon icon will look like the shown below in picture.

Alternative Method:
You can use any image hosting websites to store your Favicon icon. Some popular ones are:

Imageshack
Tinypic.com
Photobucket.com

Some of these websites requires you to first sign up for free and then provides you the image hosting service. Imageshack and Tinypic.com do not require any sign up or registration. After uploading your Favicon image these websites will display the Favicon image url copy it for the use in your blogger template.
Step 1:From your Dashboard Goto>layout>Edit HTML. Check Expand Widget Templates and download the full template before making any change.
Step 2:Scroll down to where you find this line of text
]]></b:skin>

Step 3:Copy the following 2 lines of code(in blue) just below above line of code.


<link href=’Paste Your Favicon image url here’ rel='shortcut icon'/>
<link href=’Paste Your Favicon image url here’ rel='icon'/>


In my blog I have used following two line of code(After Pasting the Favicon url):


<link href='https://blogger.googleusercontent.com/img/b/R29vZ2xl/AVvXsEj7xdCt4utYKvEPQcyUKX1JkXUVNN3VXV1mQcp3ahi_-2r6UKx4QIGnI-fbWl1CFZuapKhLZmXXnd0WUPIwDH5wjiqQnaw6apNRP__O-rmbKPFFunOazHWXwpyfmonEODSKl3k_i1QxdJs/s320/favicon.ico' rel='shortcut icon'/>
<link href='https://blogger.googleusercontent.com/img/b/R29vZ2xl/AVvXsEj7xdCt4utYKvEPQcyUKX1JkXUVNN3VXV1mQcp3ahi_-2r6UKx4QIGnI-fbWl1CFZuapKhLZmXXnd0WUPIwDH5wjiqQnaw6apNRP__O-rmbKPFFunOazHWXwpyfmonEODSKl3k_i1QxdJs/s320/favicon.ico' rel='icon'/>


Step 4:Save the template and Preview you blog in the browser.Finally it will look like as below:


Recent Articles:
What is Web 2.0
How to submit blogger blog sitemap to google
10 Tips to increase traffic to your blogger blog
How to add Tags in a post in blogger template
Tips to speed up Your Computer
Blog Title’s Dilemma
How to embed comment form below Post in blogger template

.

m
